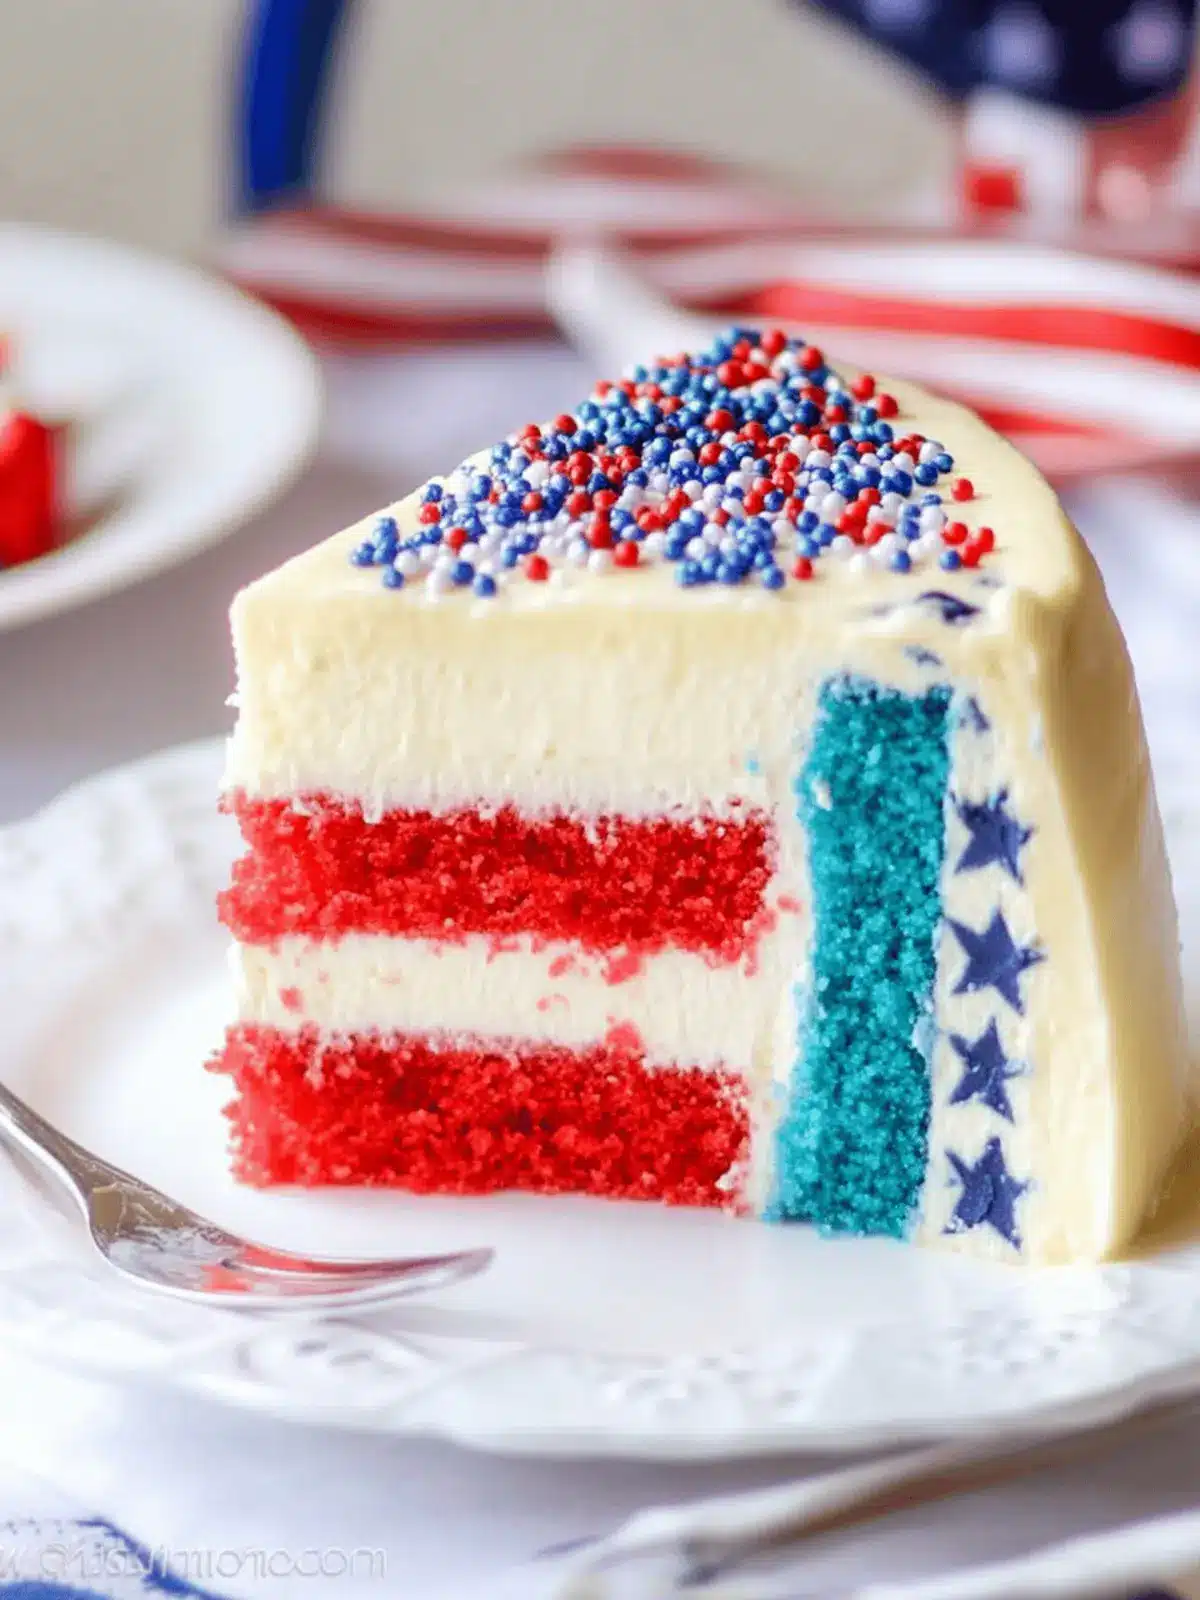
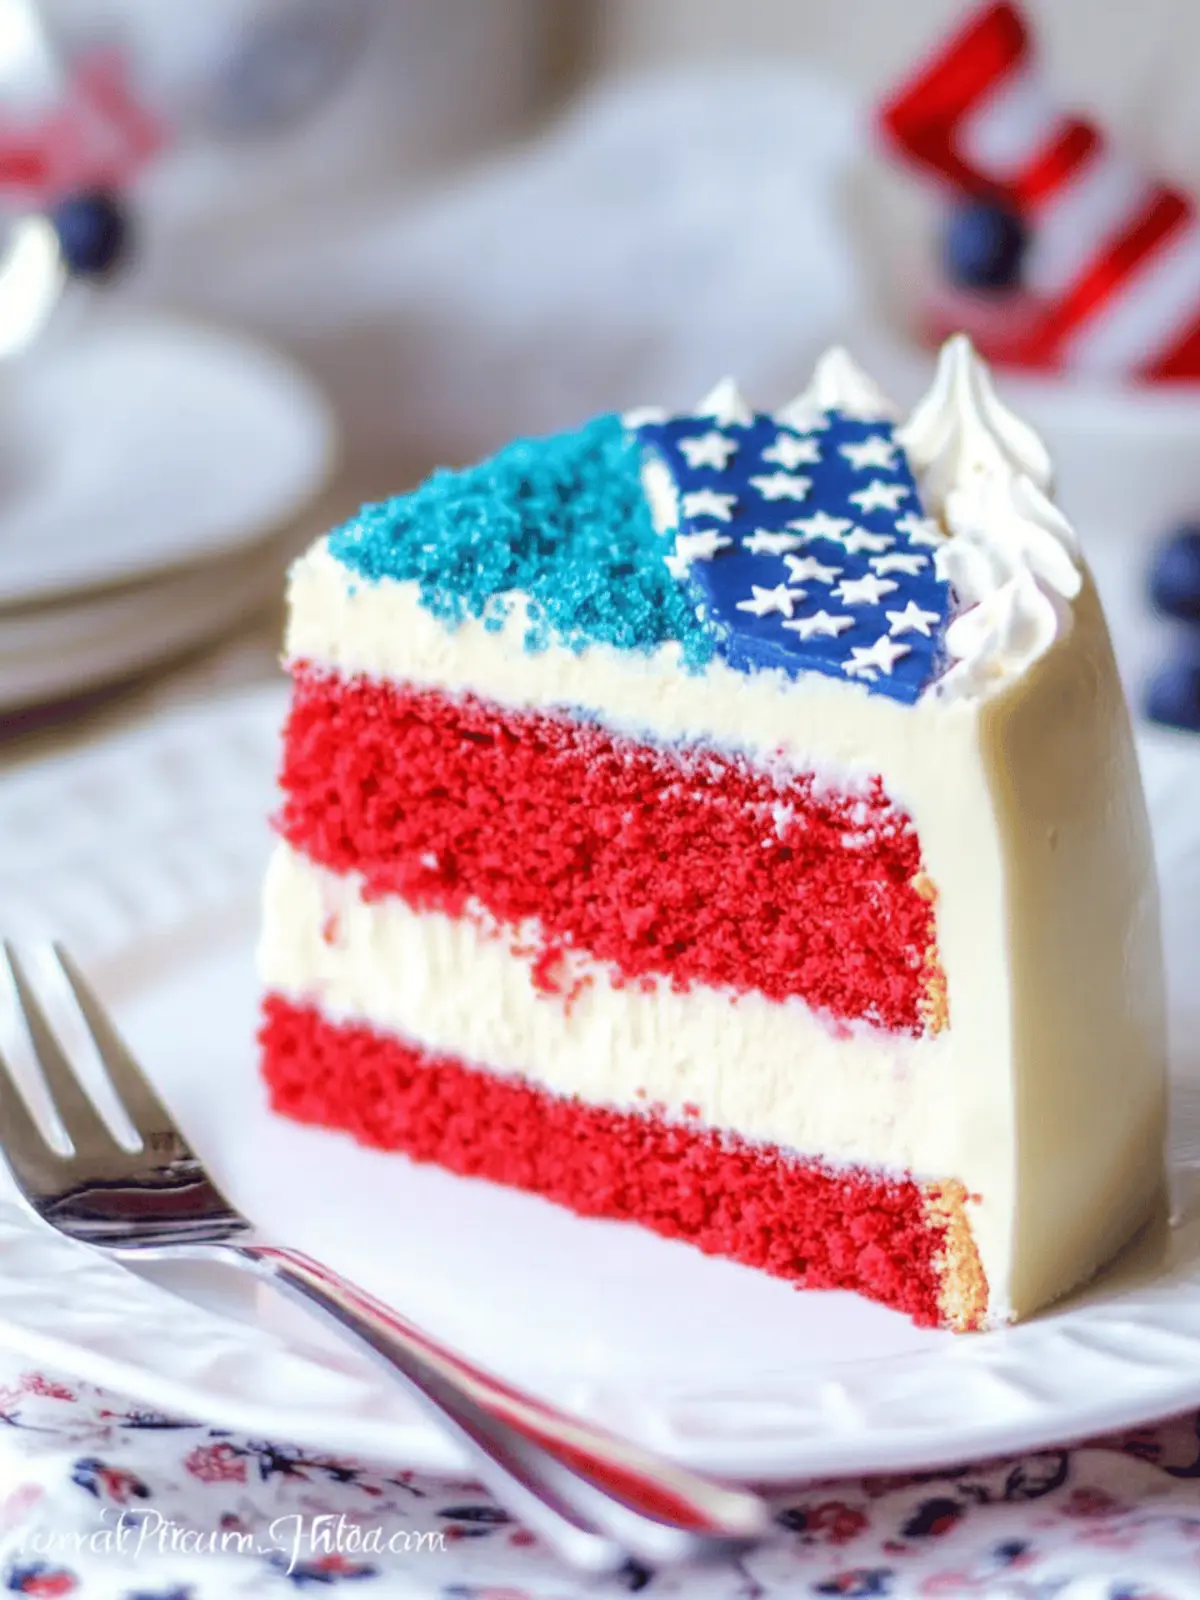
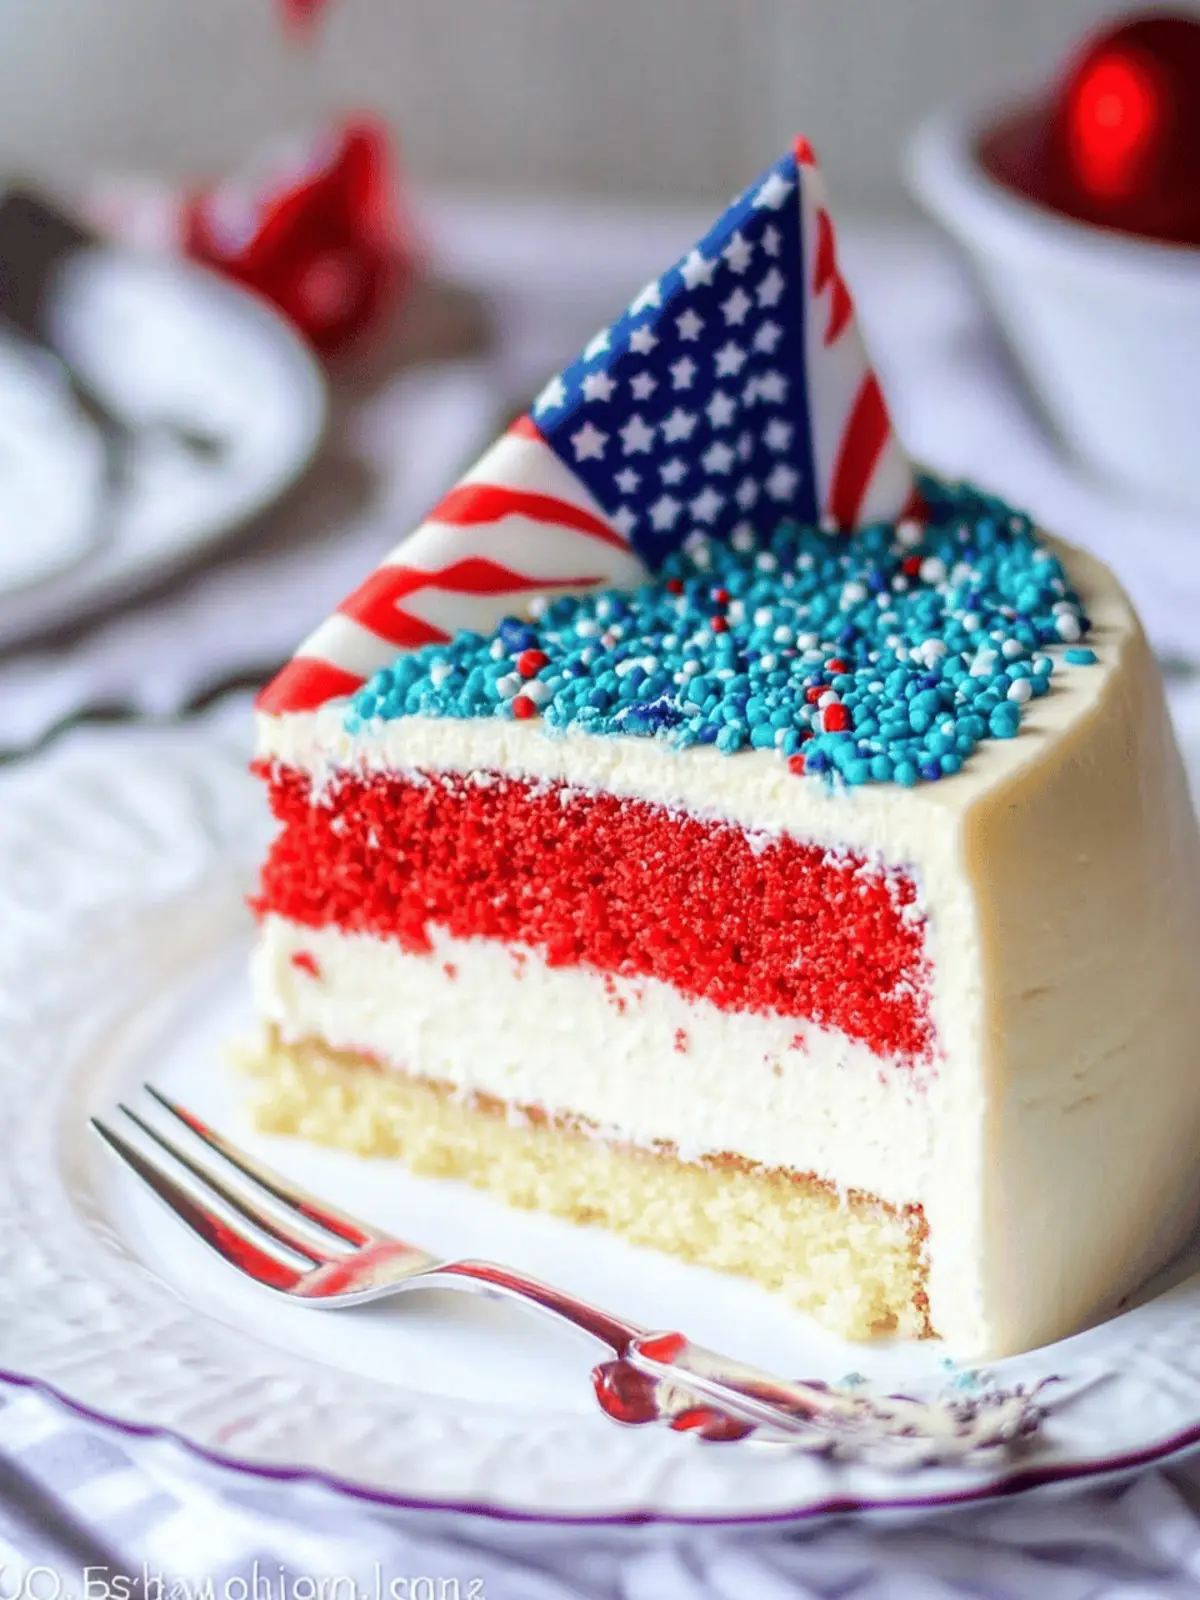
When summer celebrations roll around, I find myself yearning for something that captures the essence of the season while delighting my taste buds. Enter the Red White and Blue Cheesecake Cake—an irresistible dessert that merges the creamy decadence of cheesecake with layers of vibrant, colorful cake. The first time I served this showstopper, it was met with gasps of delight, and it quickly became my go-to for picnics and barbecues.
The beauty of this recipe lies not just in its stunning presentation but also in its surprisingly simple preparation. Perfectly paired with a subtle sweetness and a hint of nostalgia, each slice is a celebration in itself. If you’re tired of the mundane fast food routine or simply looking to impress without the fuss, this cake is your answer. Ready to make memories and satisfy cravings? Let’s dive into the delightful layers of this festive treat!
Why Choose Red White and Blue Cheesecake Cake?
Stunning Presentation: This cake is a true showstopper, with vibrant red and blue layers that scream celebration!
Easy to Make: Despite its impressive look, the steps are straightforward, making it perfect for bakers of all levels.
Deliciously Unique: The combination of creamy cheesecake and fluffy cake layers creates a delightful experience for your taste buds.
Perfect for Any Occasion: Whether it’s a summer picnic or a festive gathering, this cake is sure to impress family and friends.
Crowd-Pleasing Flavor: Sweet, creamy, and colorful, every slice is a hit, leaving everyone eager for the next bite.
Time-Saver Delight: Ready in just a couple of hours, this recipe fits perfectly into your busy schedule while delivering a dessert that looks like it took all day to prepare.
Red White and Blue Cheesecake Cake Ingredients
For the Cheesecake Layer
- Cream Cheese – 8 oz of cream cheese provides the rich and creamy base that every cheesecake craves.
- Granulated Sugar – 1 cup sweetens the cheesecake layer to perfection; feel free to substitute with a sugar alternative if desired.
- Large Eggs – 3 large eggs help bind the cheesecake together, ensuring a perfect set.
- Sour Cream – 1/2 cup adds a tangy flavor that balances the sweetness beautifully.
- Heavy Cream – 1/2 cup lends an indulgent richness to the cheesecake texture.
- Vanilla Extract – 1 tsp of pure vanilla extract adds a delightful aroma and enhances flavor.
- Salt – A pinch of salt rounds out and enhances all the flavors beautifully.
For the Cake Layers
- All-Purpose Flour – 2 1/2 cups of flour create a sturdy foundation for the cake layers; ensure you measure correctly for optimal results.
- Baking Powder – 1 tbsp is vital for leavening, helping the cakes rise to a fluffy finish.
- Salt – 1/2 tsp of salt balances the sweetness in the cake layers.
- Granulated Sugar – 1 cup sweetens the cake, echoing the flavors of your cheesecake layer.
- Unsalted Butter – 1 cup of softened butter adds richness and moisture to the cake.
- Large Eggs – 4 large eggs ensure a beautifully moist cake.
- Whole Milk – 1 cup brings the batter together, adding to the cake’s delicious texture.
- Vanilla Extract – 1 tsp for a flavor kick; make sure it’s pure for the best taste.
- Gel Paste Food Coloring (Red and Blue) – Use as needed to create the festive colors in your cake layers.
- Cocoa Powder (Optional) – 2 tbsp can be added to the red layer for a chocolatey twist.
For the Frosting
- Unsalted Butter – 1/2 cup of softened butter provides the creamy base for the frosting.
- Cream Cheese – 8 oz adds a delightful cheesiness to your frosting, echoing the cheesecake layer.
- Powdered Sugar – 4 cups create a sweet, fluffy frosting; adjust the amount for your desired sweetness.
- Vanilla Extract – 1 tsp enhances the flavor of your frosting, tying everything together.
- Salt – A pinch balances the sweetness for a perfectly harmonious flavor.
- Milk – Add as needed for adjusting the consistency of your frosting.
- Festive Sprinkles (Optional) – A sprinkle of fun on your finished cake makes it irresistibly appealing!
Get ready to bring a burst of color and flavor to your table with this Red White and Blue Cheesecake Cake!
How to Make Red White and Blue Cheesecake Cake
-
Beat Cream Cheese: Begin by beating 8 oz of softened cream cheese until it’s silky smooth. Gradually add in 1 cup of granulated sugar, followed by 3 large eggs, 1/2 cup sour cream, 1/2 cup heavy cream, 1 tsp vanilla extract, and a pinch of salt, mixing until well combined.
-
Bake Cheesecake: Pour the creamy mixture into a greased 9-inch springform pan. Bake at 325°F for about 45 minutes, until the center is just set but still slightly jiggly for the ideal texture.
-
Cool and Freeze: Allow the cheesecake layer to cool completely, then pop it in the freezer. This will make it easier to handle during assembly, especially when layering.
-
Prepare Cake Batter: Whip up your vanilla cake batter as you normally would, following your favorite recipe or the one below.
-
Color the Batter: Divide the batter into two separate bowls. In one bowl, mix in red gel paste coloring and 2 tbsp cocoa powder (if desired). In the other, combine blue gel paste coloring, ensuring both bowls are colorful and festive.
-
Bake Cake Layers: Pour each batter into greased 9-inch round pans, and bake at 350°F for 25–30 minutes. Check for doneness with a toothpick—once it comes out clean, they’re ready!
-
Cool the Layers: Once baked, allow the layers to cool completely on wire racks, which ensures they’re easier to frost and handle.
-
Make Frosting: Beat together 1/2 cup softened unsalted butter and 8 oz cream cheese until creamy and smooth.
-
Add Sweetness: Gradually mix in 4 cups of powdered sugar, adding 1 tsp vanilla extract, a pinch of salt, and a splash of milk to achieve your desired frosting consistency.
-
Layer the Cake: Place the red cake layer on your serving plate and spread a thin layer of frosting on top to seal in the flavors.
-
Add Cheesecake Layer: Gently position the frozen cheesecake layer atop the red cake, trimming edges if necessary for a perfect fit.
-
Frost the Cheesecake: Generously spread frosting over the cheesecake layer, ensuring each bite is filled with deliciousness.
-
Top with Blue Cake: Place the blue cake layer on top, completing the colorful layers.
-
Crumb Coat: Apply a crumb coat by spreading a thin layer of frosting over the entire cake, securing any crumbs. Chill briefly to set this layer.
-
Finish with Frosting: Add a final thick layer of frosting, smoothing out the edges with a spatula. Decorate with festive sprinkles if desired for that extra wow factor!
Optional: Add fresh fruit on top for an extra touch of vibrant flavor.
Exact quantities are listed in the recipe card below.
Red White and Blue Cheesecake Cake Variations
Get ready to make this delightful cake even more personalized and scrumptious with fun twists and adaptations!
-
Gluten-Free: Substitute all-purpose flour with a gluten-free flour blend to keep the texture while making it gluten-friendly.
-
Fruit-Infused: Add pureed strawberries or blueberries in the cake batter for a natural fruit flavor that pairs beautifully with the colors.
-
Lower Sugar: Use a sugar substitute like monk fruit or stevia in both the cheesecake and cake layers for a lighter version that doesn’t skimp on flavor.
-
Chocolate Lovers: Mix cocoa powder into the blue cake layer too, or replace the red layer entirely with a chocolate cake for a decadent twist.
-
Creamy Whipped Topping: Instead of frosting, top each slice with whipped cream; it’ll add a light texture that contrasts well with the dense layers.
-
Vegan-Friendly: Substitute cream cheese with vegan cream cheese, eggs with flaxseed meal, and dairy with almond milk for a delightful vegan dessert.
-
Nutty Crunch: Fold in crushed nuts into the cake batter for extra texture, such as almond or walnut pieces, which would add a lovely crunch.
-
Spiced Layers: Incorporate cinnamon or nutmeg into the cake batter for a warm, aromatic touch that balances the sweetness perfectly.
Explore these variations to find your perfect slice of joy!
Expert Tips for Red White and Blue Cheesecake Cake
-
Chill the Cheesecake: Make sure to freeze the cheesecake layer after baking; it’s easier to assemble and frost when firm.
-
Color Consistency: Use gel paste food coloring; it provides vibrant colors without altering the batter’s texture. Avoid liquid dyes, which can make the batter too runny.
-
Don’t Overmix: When blending the cheesecake ingredients, mix just until combined. Overmixing can lead to cracks in your cheesecake after baking.
-
Cool Completely: Allow each cake layer to cool thoroughly to prevent melting the frosting. Warm layers can cause a gooey mess!
-
Crumb Coat Mastery: Applying a crumb coat before the final frosting helps achieve a smooth finish. Chill briefly to set it before adding the thicker layer.
-
Serve Fresh: For the best taste, serve this Red White and Blue Cheesecake Cake the same day you make it. Leftovers can be stored but will gradually lose their appealing texture.
Make Ahead Options
These Red White and Blue Cheesecake Cake layers are perfect for meal prep enthusiasts! You can prepare the cheesecake layer up to 24 hours in advance, allowing the flavors to meld beautifully. To do this, bake and cool the cheesecake, then wrap it tightly in plastic wrap and refrigerate. The cake layers can also be made ahead and stored in an airtight container for up to 3 days. When you’re ready to serve, simply frost and assemble as directed for that fresh, beautiful presentation. This saves you time on the day of your gathering, ensuring your dessert is just as delicious and festive without the last-minute rush!
How to Store and Freeze Red White and Blue Cheesecake Cake
Room Temperature: Enjoy the cake at room temperature for up to 2 hours for optimal flavor, but don’t leave it out longer to ensure freshness.
Fridge: Store leftovers tightly covered in the refrigerator for up to 3 days. Always keep the cheesecake layer well-wrapped to maintain its creamy texture.
Freezer: If you want to preserve it longer, wrap individual slices in plastic wrap and place them in an airtight container to freeze for up to a month.
Reheating: Thaw slices overnight in the fridge before enjoying. For a warm treat, quickly microwave a slice for about 10–15 seconds!
What to Serve with Red White and Blue Cheesecake Cake?
When planning your summer gatherings, consider these delightful pairings that complement this vibrant dessert perfectly.
-
Fresh Fruit Salad: A medley of seasonal fruits adds a refreshing zing that contrasts beautifully with the creamy cake. Think sweet strawberries, juicy blueberries, and even a hint of mint for brightness.
-
Vanilla Ice Cream: Serve alongside a scoop of vanilla ice cream for that classic flavor combination. The creamy, cold scoop melts nicely into each sweet slice, making every bite even more indulgent.
-
Sparkling Lemonade: The fizzy zing of homemade sparkling lemonade is the ideal drink to wash down the richness of the cake. With a hint of tartness, it enhances the sweet flavors, making it a thirst-quenching choice.
-
Chocolate Dipped Strawberries: For an elegant touch, pair your cake with chocolate-dipped strawberries. The rich chocolate contrasts with the cake’s sweetness, while the berries maintain a fresh element.
-
Whipped Cream: A cloud of light and fluffy whipped cream adds an airy contrast to the dense layers of cake and cheesecake, enhancing the overall texture and taste experience.
-
Berry Compote: A warm berry compote drizzled over cake slices harmonizes beautifully with the flavors, offering a sweet-tart burst that balances the richness perfectly.
-
Mint Tea: Serve a soothing mint tea alongside for a refreshing finish. Its herbal notes cleanse the palate and are a delightful refresher after indulging in a sweet treat.
-
Fruit Sorbet: For a lighter option, offer a fruit sorbet like raspberry or mango. Its icy texture and fruity flavors provide a refreshing complement without overshadowing the cake.
Red White and Blue Cheesecake Cake Recipe FAQs
What is the best way to select fresh cream cheese for this cheesecake?
When selecting cream cheese, look for a block labeled “softened” for easy blending. Avoid cream cheese that has dark spots or a broken seal, as these can indicate spoilage. The cream cheese should have a smooth, uniform consistency.
How should I store the Red White and Blue Cheesecake Cake?
Store your cake tightly covered in the refrigerator for up to 3 days. It’s best to keep the cheesecake layer well-wrapped to maintain its creamy texture. For optimal flavor, allow the cake to sit at room temperature for about 30 minutes before serving.
Can I freeze the Red White and Blue Cheesecake Cake? How?
Absolutely! To freeze, first cool the cake completely and assemble it. Wrap individual slices in plastic wrap, then place them in an airtight container. You can freeze it for up to 3 months. When you’re ready to enjoy a slice, simply thaw it in the refrigerator overnight or microwave it on low for about 10–15 seconds.
What should I do if the cake layers are domed after baking?
If your cake layers have domed tops, don’t worry! You can level them easily using a serrated knife. Just carefully slice off the domed portions to create flat surfaces—this will help in stacking your layers evenly and achieving that picture-perfect cake appearance.
Can I make this cake gluten-free?
Yes! To make a gluten-free version of the Red White and Blue Cheesecake Cake, substitute all-purpose flour with a gluten-free baking blend. Ensure that all other ingredients, like baking powder and sprinkles (if used), are also gluten-free. The taste will still be fabulous!
Is this cake safe for pets?
No, it’s best not to share this cake with pets. Ingredients like cream cheese and sugar are not healthy for them. Always keep your baked goods out of reach of furry friends to avoid any potential tummy troubles!
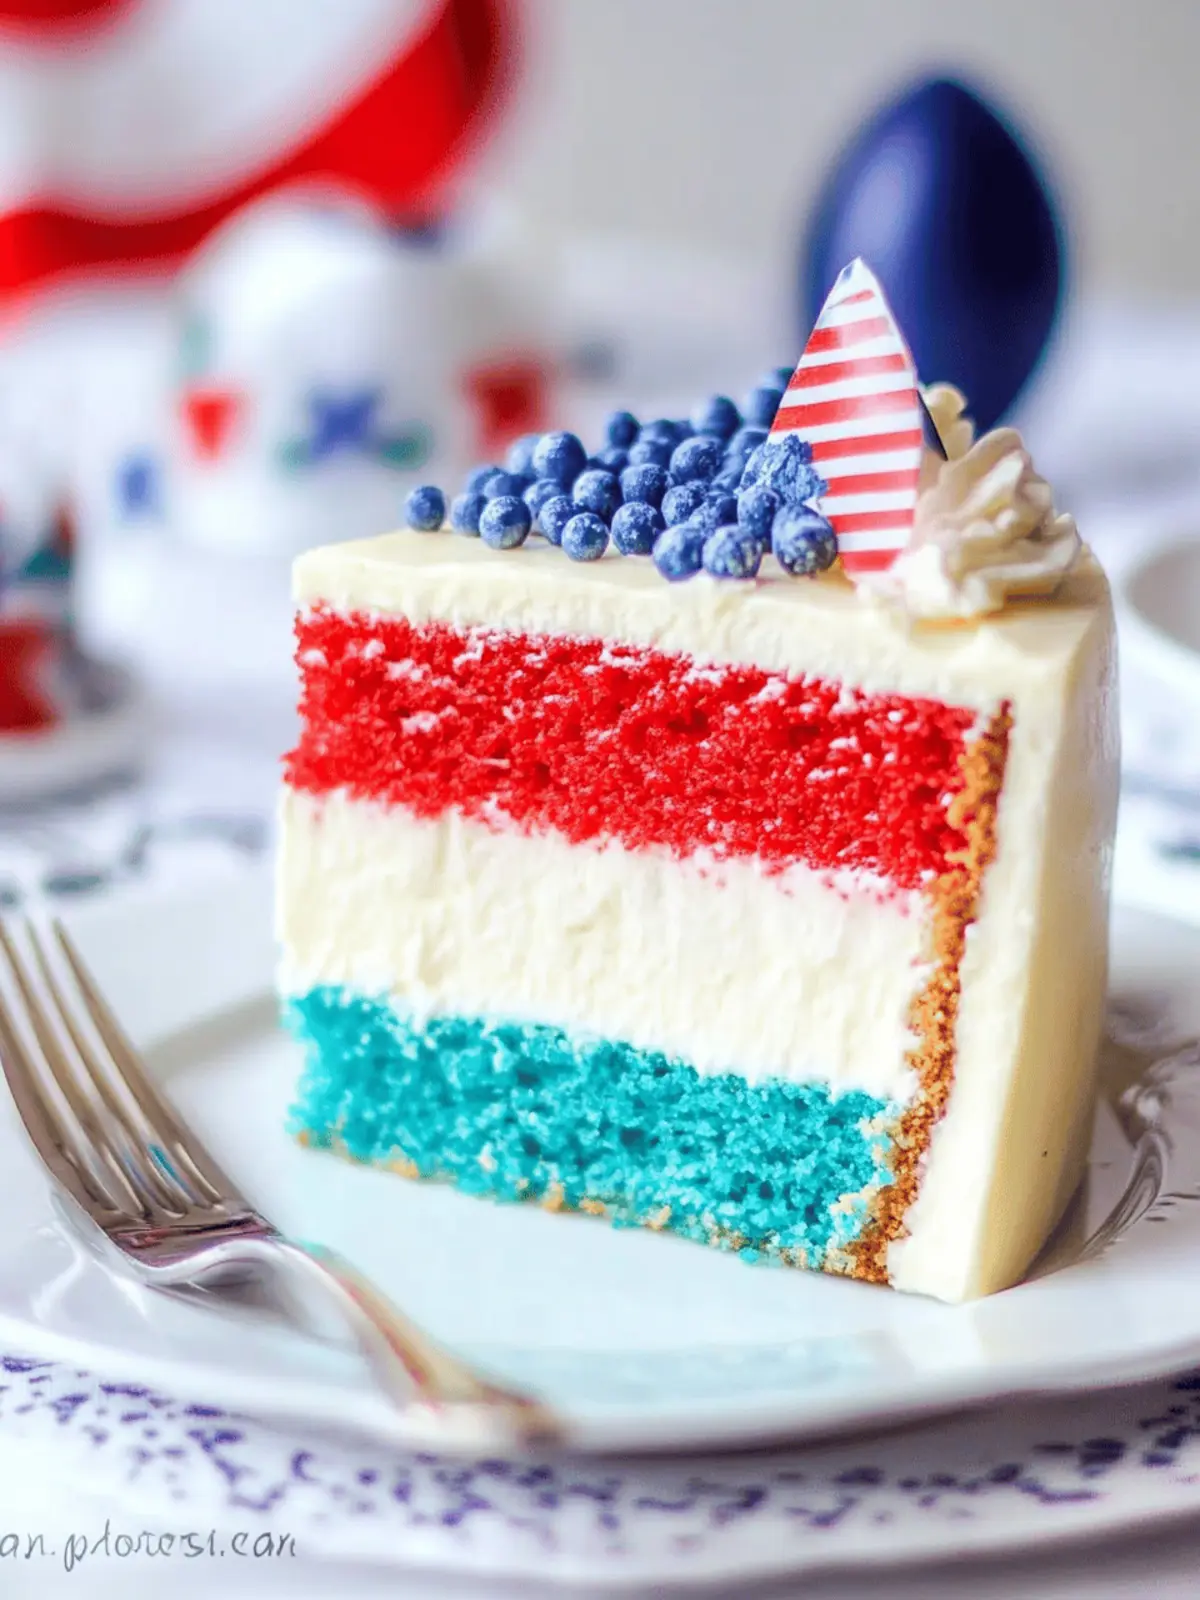
Red White and Blue Cheesecake Cake: A Sweet Festive Delight
Ingredients
Equipment
Method
- Beat cream cheese until silky smooth, then gradually add sugar, eggs, sour cream, heavy cream, vanilla extract, and salt until well combined.
- Pour the mixture into a greased 9-inch springform pan and bake at 325°F for about 45 minutes.
- Allow the cheesecake layer to cool completely, then freeze to make assembly easier.
- Prepare your cake batter following your favorite recipe.
- Divide the batter, coloring one part red and the other blue using gel paste.
- Pour the batters into greased pans and bake at 350°F for 25–30 minutes.
- Cool the layers on wire racks completely.
- Beat together unsalted butter and cream cheese for the frosting.
- Gradually mix in powdered sugar, vanilla extract, salt, and milk to achieve desired consistency.
- Layer the red cake on a serving plate and frost it lightly.
- Place the cheesecake layer on top, then frost it generously.
- Top with the blue cake layer, apply a crumb coat, and chill briefly.
- Finish with a thicker layer of frosting and decorate with sprinkles if desired.

