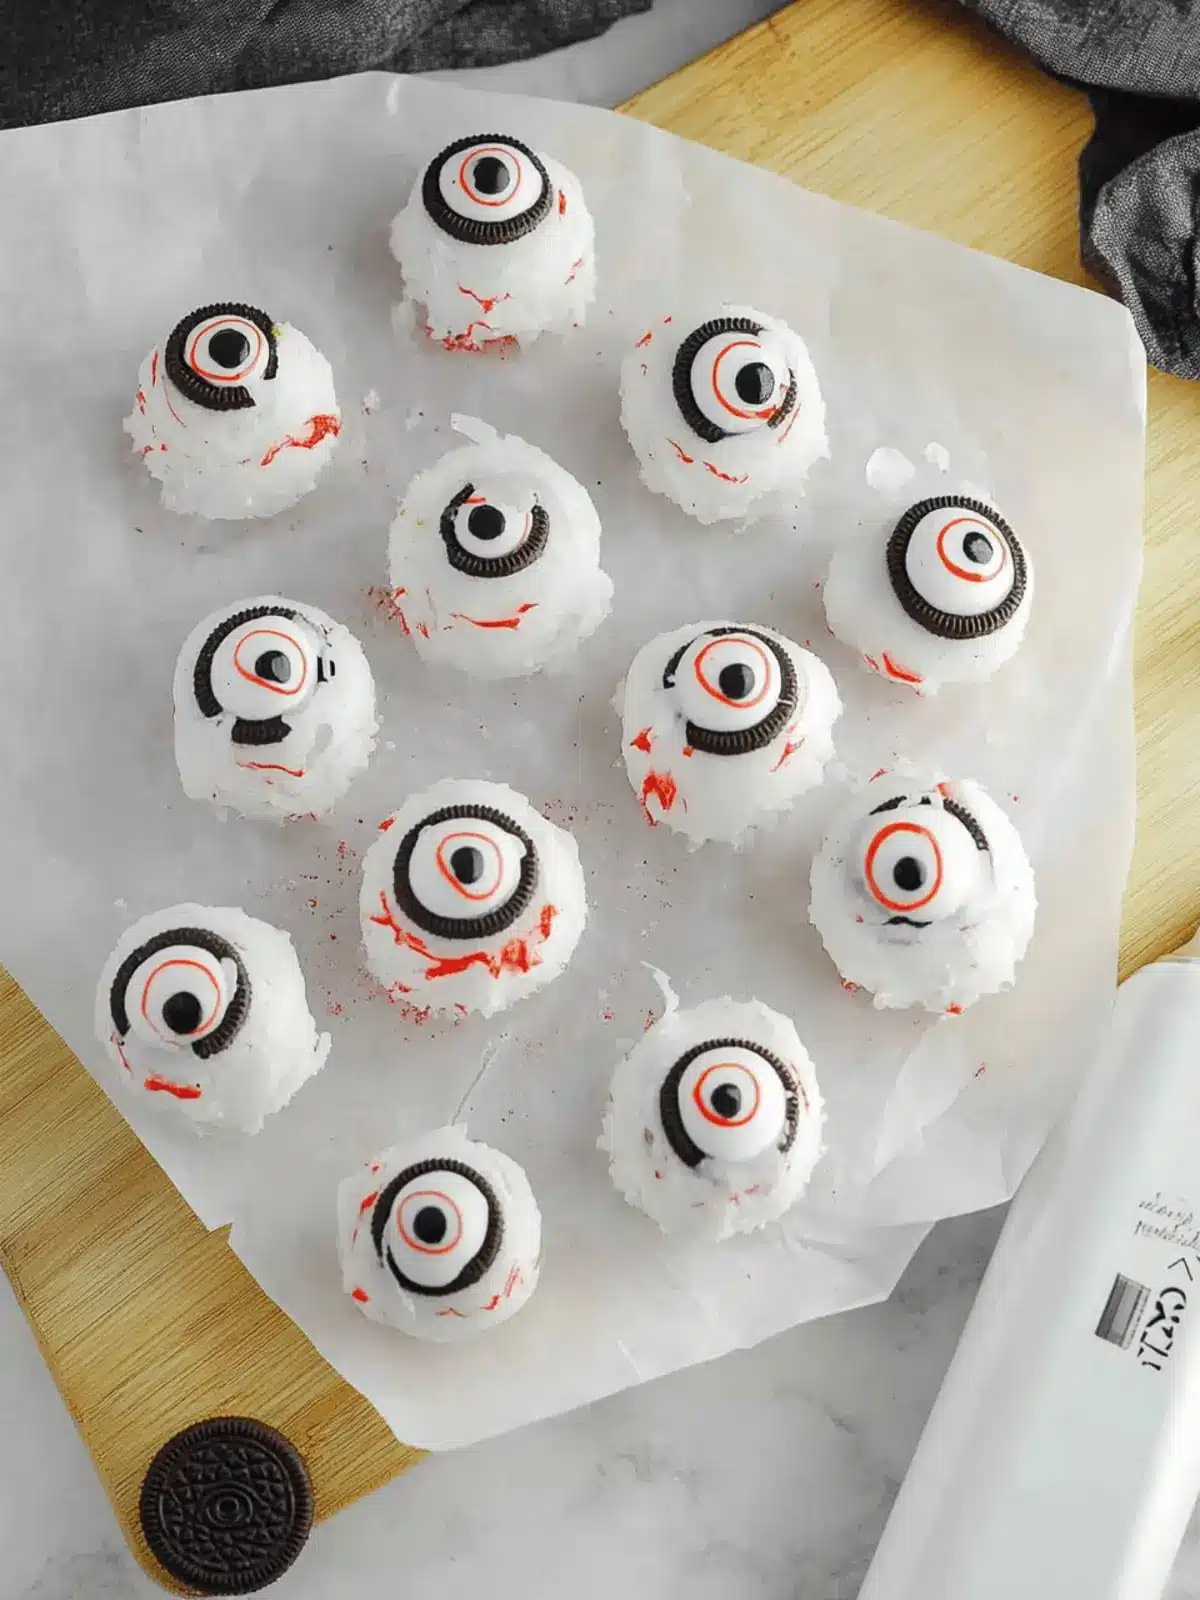
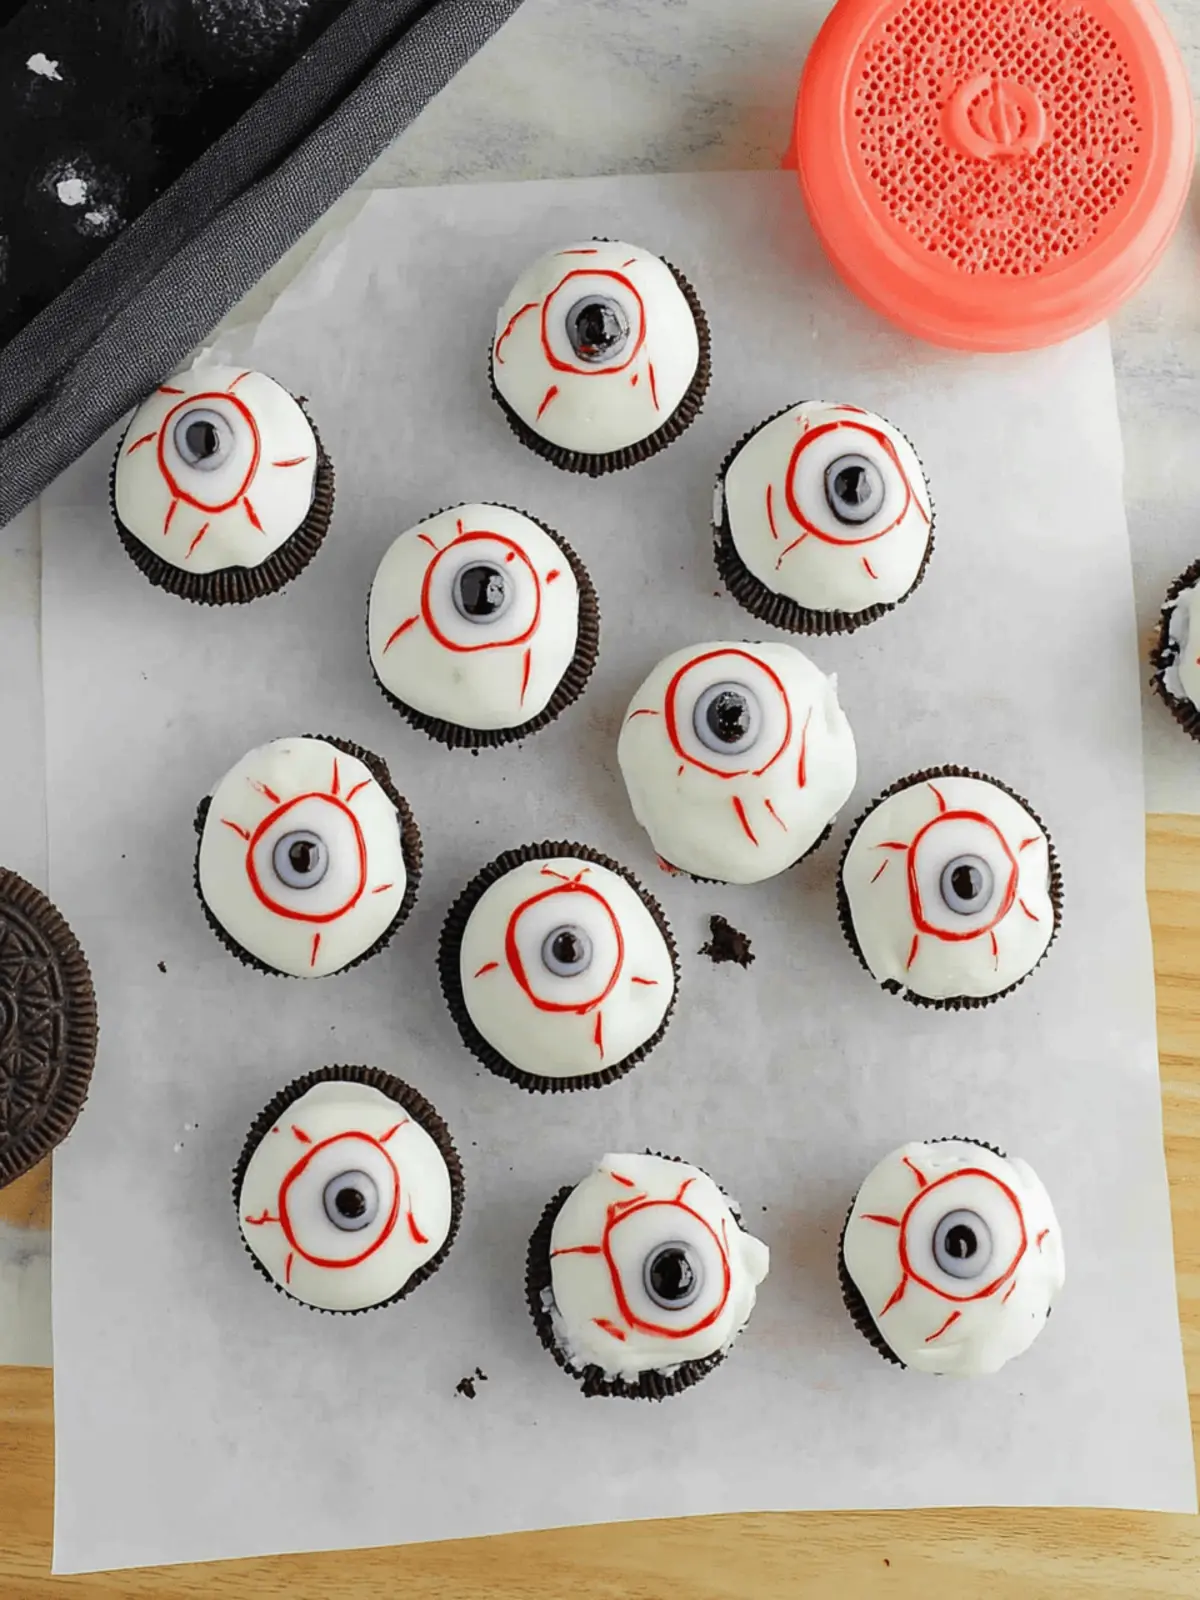
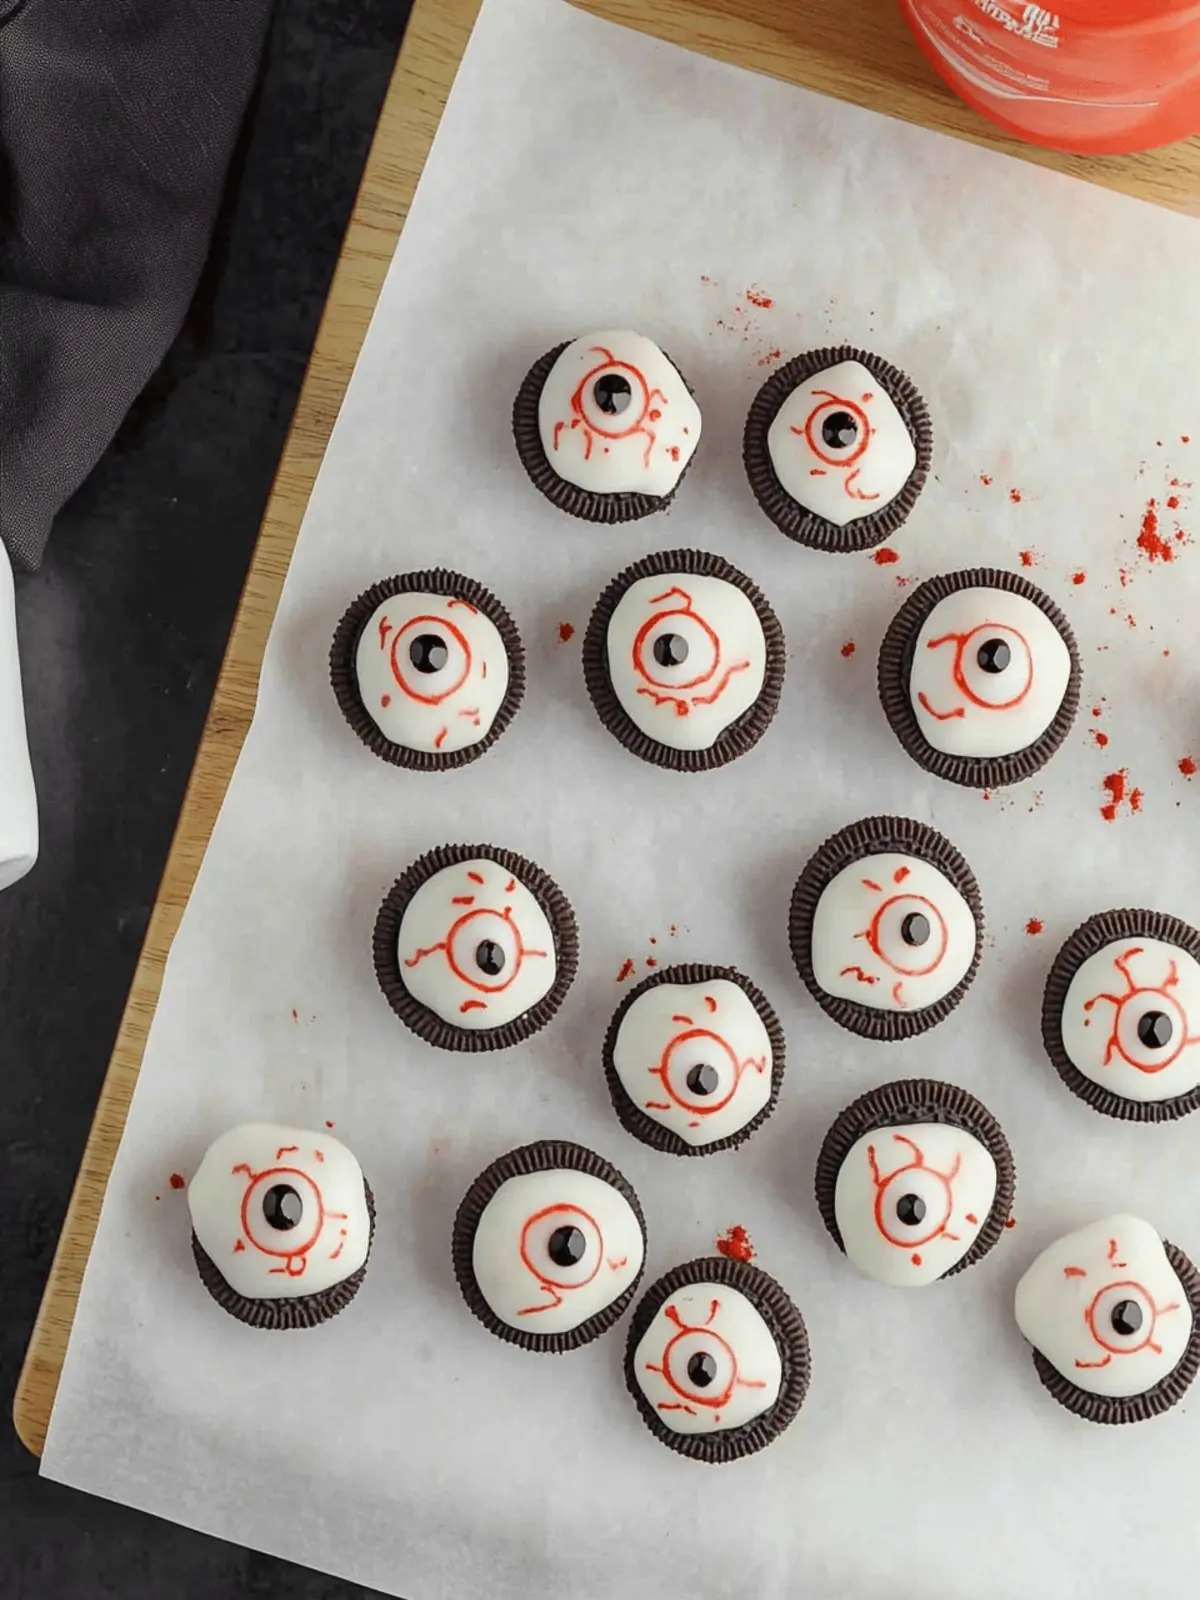
As the leaves turn and the air becomes crisp, Halloween draws near, bringing an opportunity for some frightful fun in the kitchen. This year, I wanted to whip up a treat that would not only delight but also surprise my guests. Enter the Oreo Eyeballs—these no-bake eerie delights are a feast for both the eyes and the taste buds! With the perfect blend of creamy Oreo and cream cheese filling, each spooky truffle is adorned with candy eyes and a splash of red gel that adds just a hint of playfulness to their ghoulish appearance.
When the kids in my neighborhood come trick-or-treating, I want to offer them something more than just candy bars! These Oreo Eyeballs are not only quick and easy to make but also a fantastic way to entertain both the young and the young-at-heart at any Halloween gathering. Plus, their creamy texture coupled with a delicious crunch from the candy coating makes each bite a delightful experience. Ready to impress your family and friends with these spooky delights? Let’s dive into this deliciously fun recipe!
Why are Oreo Eyeballs a Halloween hit?
Spooktacular Fun: These Oreo Eyeballs are the ultimate no-bake treat that turns your Halloween celebrations into a festive delight!
Quick Preparation: With just a few ingredients and minimal time required, you can whip these up in no time, perfect for busy schedules.
Crowd Pleaser: Kids and adults alike will be drawn to these creepy yet delicious treats that look as good as they taste.
Versatile Customizations: Swap out ingredients for a personal touch, like adding Rice Krispie cereal for extra crunch or using different cookie varieties!
Visual Appeal: The delightful mix of colors and textures not only pleases the palate but also creates a striking display at parties.
Memorable Twists: Elevate regular gatherings to something extraordinary, making these eyeballs a Halloween staple in your home!
Oreo Eyeballs Ingredients
• Creating these creepy delights is easier than you think!
For the Filling
• Oreo Cookies – The main ingredient providing sweetness and structure; feel free to use any chocolate sandwich cookie if Oreos are unavailable.
• Cream Cheese – Binds the mixture and adds a rich creaminess; using softened cream cheese will help with mixing.
For the Coating
• White Candy Melts – This coating gives the eyeballs a smooth and visually appealing finish; you can replace them with white chocolate chips or almond bark, just be careful not to overheat while melting.
For the Decoration
• Candy Eyes – These fun decorations provide that spooky visual effect; you can use M&M candies or small dollops of dark chocolate if you run out of candy eyes.
• Red Decorating Gel – Adds a bloodshot look to mimic creepy eyes; alternatively, use red licorice for a decorative drizzle or food coloring markers for precise detailing.
With these ingredients on hand, you’re ready to create some unforgettable Oreo Eyeballs that will be the talk of the Halloween season!
How to Make Oreo Eyeballs
-
Crush Oreos: Grab a zip-lock bag and place whole Oreo cookies inside. Crush them until you have fine crumbs; alternatively, use a food processor for a quicker method. This will form the tasty base for your treats.
-
Mix Ingredients: In a medium bowl, combine your freshly crushed Oreos and softened cream cheese. Stir until well mixed, creating a smooth, creamy filling that binds everything deliciously together.
-
Form Balls: Use a cookie scoop to portion out the mixture and roll it into 1-inch balls. Place each ball on a lined baking sheet, ensuring they’re spaced out for easy handling later.
-
Chill: Refrigerate the formed balls for at least 1 hour. This step is crucial as it firms them up, making the next steps mess-free and enjoyable.
-
Melt Coating: In a microwave-safe bowl, heat your white candy melts in 30-second increments, stirring in between until fully melted and smooth. Be cautious to avoid overheating; we want silky coating, not a lumpy mixture!
-
Coat Balls: Carefully dip each chilled ball into the melted candy, ensuring it’s fully coated. Tap off any excess before returning them to the lined baking sheet, creating a delightful dipped finish.
-
Hardening: Once all the balls are coated, pop them back in the refrigerator for 30 minutes. This allows the coating to harden beautifully, ensuring perfect texture for your spooky treats.
-
Decorate: After the coating has set, take each ball and add a dollop of red gel on top, then gently press on a candy eye. This final touch gives your Oreo Eyeballs their creepy yet fun appearance!
Optional: For a crunchy twist, roll the balls in Rice Krispie cereal before coating.
Exact quantities are listed in the recipe card below.
Oreo Eyeballs Variations
Get ready to customize your spooky treats with these fun twists that will elevate your Oreo Eyeballs!
-
Nutty Delight: Add chopped nuts, like almonds or walnuts, into the filling for a delightful crunch and nutty flavor.
-
Pumpkin Spice: Mix in a teaspoon of pumpkin spice to the filling for a seasonal twist that captures the spirit of fall.
-
Dairy-Free: Swap cream cheese with a dairy-free cream cheese alternative, perfect for plant-based diets without losing the creamy texture.
-
Chocolate Coating: Instead of white candy melts, use dark or milk chocolate for a richer, deeper flavor that complements the Oreo filling.
-
Fiery Spice: Add a pinch of cayenne pepper to the filling for a surprising kick, crafting a treat that’s both sweet and spicy.
-
Crunchy Cereal: Incorporate a cup of Rice Krispie cereal into the filling for added crunch and texture, creating a fun treat for all ages.
-
Colorful Coating: Use colored candy melts for a playful, vibrant appearance that will bring even more fun to your Halloween display.
-
S’mores Style: Mix in graham cracker crumbs with the Oreo filling for a delightful s’mores flavor that will transport you back to campfires!
What to Serve with Oreo Eyeballs?
As Halloween approaches, it’s the perfect time to create a spooktacular spread that accompanies these delightful treats.
-
Crispy Apple Slices: The refreshing crunch of apple slices offers a light contrast to the creamy Oreo Eyeballs, perfect for balancing sweetness.
-
Pumpkin Spice Cupcakes: These warm, spiced delights celebrate the season and pair well with the rich chocolate flavor of the Oreo treats.
-
Ghoulish Punch: Serve a vibrant, fruit-flavored punch in a clear bowl with floating fruit “eyes” for a fun, festive drink option that keeps the Halloween spirit alive.
-
Cheese and Cracker Platter: A savory cheese board allows guests to enjoy a variety of flavors and textures before diving into the sweet Oreo Eyeballs.
-
Chocolate-Covered Pretzels: The sweet and salty combination of these treats adds a delightful crunch, making each bite an engaging experience.
-
Monster Marshmallow Pops: These cute and creepy pops can entertain guests of all ages and enhance the spooky atmosphere of your Halloween gathering.
-
Caramel Corn: This sweet, crunchy snack provides an enjoyable texture contrast while complementing the rich taste of the Oreo Eyeballs.
Elevate your Halloween gathering with these delightful pairings and make it an unforgettable experience for everyone!
Make Ahead Options
These Oreo Eyeballs are ideal for meal prep, allowing busy home cooks to save time without sacrificing fun! You can prepare the filling (the crushed Oreos mixed with cream cheese) up to 24 hours in advance; simply store it in an airtight container in the refrigerator to maintain freshness. Additionally, once you form the balls, refrigerate them for up to 3 days before coating. Just keep them in a sealed container to avoid drying out. When you’re ready to impress your guests, finish by melting the white candy melts and dipping the chilled Oreo balls, then adding the spooky eyes. Your delicious Halloween treats will be just as delightful, ready for any gathering with minimal last-minute effort!
Tips for the Best Oreo Eyeballs
-
Chocolate Melting: Melt white candy melts carefully at 60% power, stirring frequently, to avoid overheating and ending up with a lumpy coating.
-
Cream Cheese Softening: Ensure your cream cheese is softened before mixing to create a smooth and easily blendable filling for your Oreo Eyeballs.
-
Chilling Time: Don’t skip the chilling step! Refrigerating the formed balls for at least an hour is crucial for achieving a firm texture before coating.
-
Decorating Fun: Get creative with decorations! Use colored gel or various candy eyes to make each Oreo Eyeball unique and extra spooky for your Halloween event.
-
Storing Wisely: Place parchment paper between layers when storing your Oreo Eyeballs in an airtight container to prevent sticking during refrigeration.
How to Store and Freeze Oreo Eyeballs
- Fridge: Store your Oreo Eyeballs in an airtight container in the refrigerator for up to 5 days to maintain their freshness and creamy texture.
- Freezer: For longer storage, freeze the balls in a single layer on a baking sheet for a few hours before transferring them to a zip-lock bag. They will keep well for 2-3 months.
- Thawing: To enjoy, simply remove from the freezer and let them thaw in the fridge for a few hours before serving.
- Layering: Use parchment paper between layers of truffles when storing to prevent them from sticking together, ensuring each spooky treat remains intact!
Oreo Eyeballs Recipe FAQs
How do I choose the best Oreos?
Absolutely! When selecting Oreos, look for packages that are intact with no signs of damage. Fresh Oreos should be crisp without any dark spots all over that indicate staleness. If you can’t find Oreos, any chocolate sandwich cookie will work perfectly as a substitute!
How should I store leftover Oreo Eyeballs?
Very simply! Store your Oreo Eyeballs in an airtight container in the refrigerator for up to 5 days. This helps maintain their creamy texture and delicious flavor while keeping them fresh. I often recommend placing parchment paper between layers to prevent them from sticking together!
Can I freeze Oreo Eyeballs for later?
Of course! To freeze your Oreo Eyeballs, start by placing them in a single layer on a baking sheet and freeze for 1-2 hours. Once they’re firm, transfer them to a zip-lock bag, squeezing out as much air as possible. They can be stored this way for up to 2-3 months. When you’re ready to enjoy them, simply let them thaw in the fridge for a few hours.
What if my candy coating doesn’t melt smoothly?
No worries at all! If your candy melts aren’t smooth, it may have been overheated. Simply add a teaspoon of vegetable oil or shortening to the mixture and stir well to achieve a smoother consistency. If you’re melting chocolate, be sure to use a lower power setting and heat in short increments for the best results.
Are these Oreo Eyeballs safe for people with allergies?
Great question! The main components—Oreos, cream cheese, and candy melts—can contain allergens like gluten, dairy, and soy. Always check the ingredient labels to ensure they fit within dietary restrictions. If making for someone with allergies, consider using dairy-free cream cheese and allergy-friendly cookies.
Can I customize the decorations on my Oreo Eyeballs?
Absolutely! The more the merrier when it comes to creativity! You can add sprinkles, different colored gels, or even use edible glitter to give them a unique touch. Personalizing each one can make your treats even more fun and festive for Halloween!
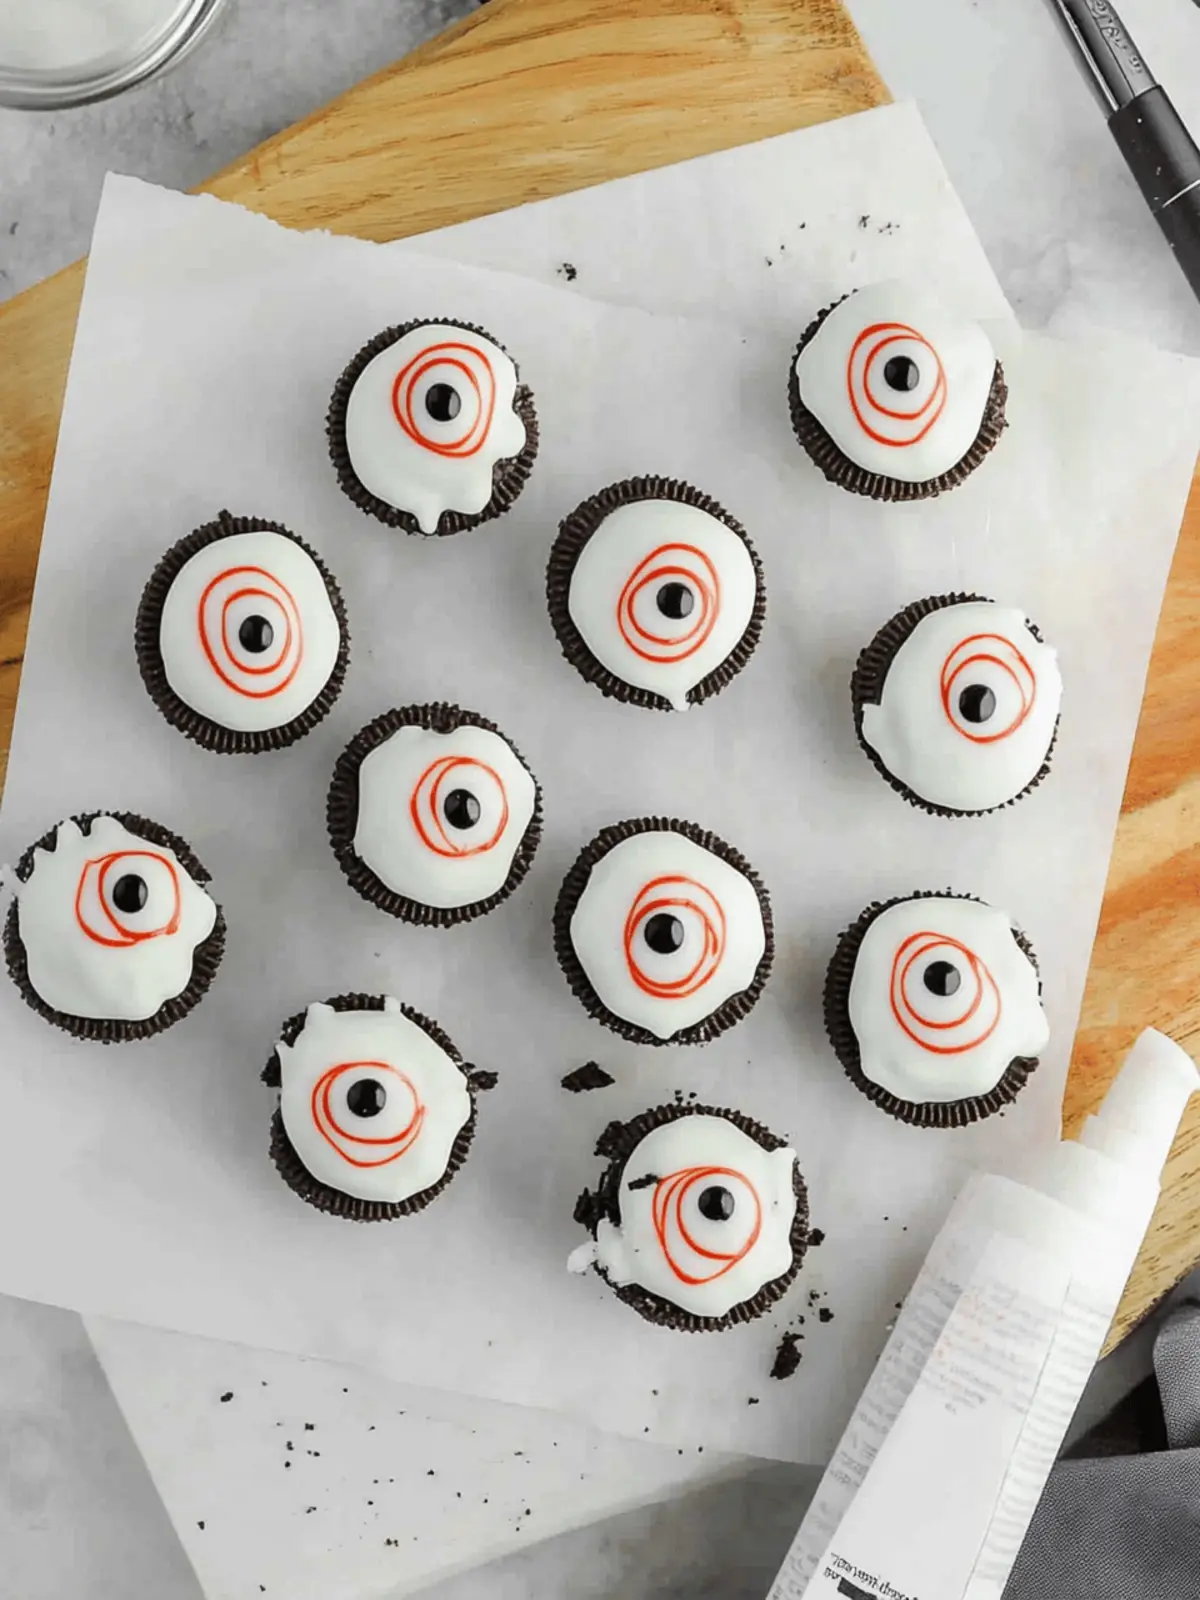
Oreo Eyeballs: Creepy No-Bake Treats for a Spooktacular Halloween
Ingredients
Equipment
Method
- Grab a zip-lock bag and place whole Oreo cookies inside. Crush them until you have fine crumbs.
- In a medium bowl, combine your freshly crushed Oreos and softened cream cheese. Stir until well mixed.
- Use a cookie scoop to portion out the mixture and roll it into 1-inch balls. Place each ball on a lined baking sheet.
- Refrigerate the formed balls for at least 1 hour.
- In a microwave-safe bowl, heat your white candy melts in 30-second increments until fully melted.
- Carefully dip each chilled ball into the melted candy, ensuring it's fully coated.
- Once all the balls are coated, pop them back in the refrigerator for 30 minutes to harden.
- Take each ball and add a dollop of red gel on top, then gently press on a candy eye.

